Here's a hint.
Guess how I will be spending the Christmas holidays?! Sun tanning somewhere in the southern hemisphere? Nope. Cruising the Carribbean? Nope. Skiing in Whistler Mountain, renting a log cabin in Vermont, checking out the bright lights of Las Vegas? Nope, nope, nope.
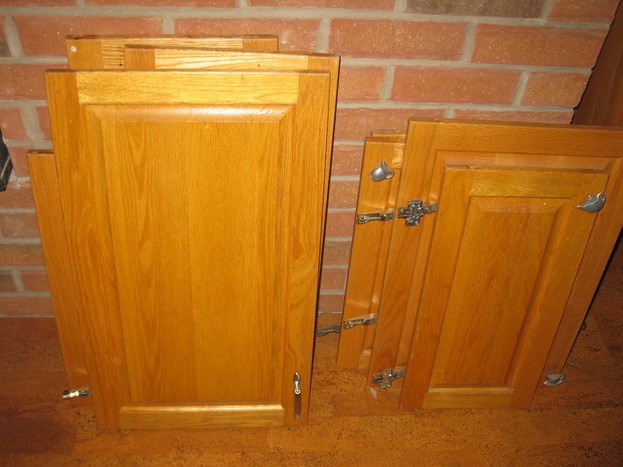
 Here's a hint. And another. 
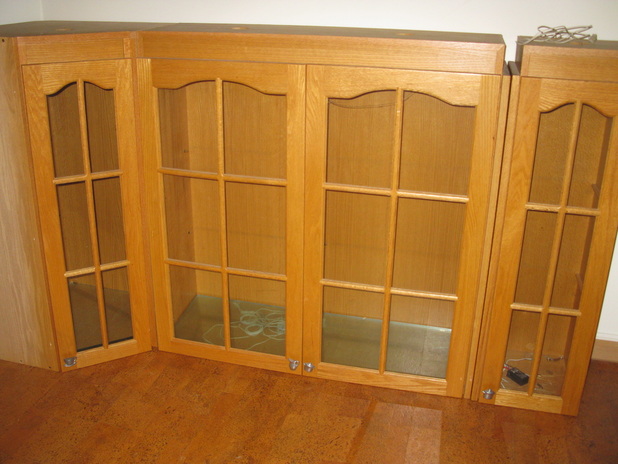
Yes, it's true, we finally have kitchen cabinets!! After ten long months of being without cabinets, I am over the moon about this. My goal was to have the cabinets before Christmas. True, I may have meant installed and finished, but beggars can't be choosers. I will be happily renovating over Christmas break. And maybe if I remain positive thinking, they'll be installed before Easter!
0 Comments
My kids have always loved swings, particularly the tire swing. At playgrounds they would rush over to the tire swing first, bypassing the regular swings. Being out in the country now, I wanted to create a playground my son would enjoy reminiscent of those in our neighbourhood parks. The tire swing was a definite requirement. We didn't want the kind where you simply hand a tire from a rope, we wanted it to be like the tires hung at the parks from three chains. Getting that professional tire swing look was quick and easy. Here's what we did for anyone interested in putting one together. First hit a local tire shop and ask them for a used tire. They pay to have them removed so will be happy to give you one for free. Even better, if you have a spare tire laying around, this makes great use of it. Make sure it is in pretty decent shape with no wires sticking out of the tracks. Drill three holes in a triangle pattern on one side of your tire. Make sure they are as near to perfect in distance apart as possible. This isn't as hard as you would think. I spent a long time trying to figure out the math equation for how to get the triangle measurments within a circle, but in the end went out to the tire and eye-balled the measurements and got it correct almost right off. It helps to use the pattern/wording/design of the tire company who already has done the math equation to layout company logo etc. on the tire. I used those points to easily find my 3 holes. When done this, flip the tire and drill holes periodically around the tire wall for rain drainage. These don't need to be perfect. Next, place an eyebolt, nut and washer in one of the triangle holes. And a nut and washer to the inside of the eyebolt. Repeat for all three holes. It should look like this when done. Next you will want to add a connector to the eyebolt and the chain. I bought all new chains as I didn't want my boy having to hold on to old rusted chains. I had the hardware store cut them in three five foot lengths. Any shorter and I think someone could get their head tangled in the chains. You will also need to get one of these. It's a locking swivel hook. I bought the biggest aka. strongest they had as it will be what holds all three chains up. You will need another connector to attach it to the chain that hangs from the tree. You are now ready to hang your tire swing. Find a perfect tree someone on your property. I chose the huge maple tree out front. It is the largest one we have and has big sturdy branches. Select a branch that has a large knot or ideally in the fork of two branches to help hold the chain in place and keep it from slipping. Disregard the old rusted chain. This was the only spot we planned on using an old chain but it turned out to be too long so will be replacing it. Next you will need two people, one to hold the tire while the other goes up the ladder and secures it to the locking swivel hook. If you have an older child that insists on testing out the strength of the swing first, then go ahead and take that step. I think however she just wanted to be the first to enjoy it. And there you have it. A great tire swing for all to enjoy.
|